Best Window Locations for Maximum Yard Coverage with Wyze Mount


Choosing the Ideal Location on Glass to Capture Maximum Yard Coverage with Wyze Window Mount
When it comes to securing your yard with a Wyze Cam, selecting the perfect spot on your window glass is crucial for maximizing coverage and minimizing glare or reflections. The Wyze Window Mount is specifically designed to help you mount your Wyze Cam v3, v3 Pro, v4, or OG series cameras directly on glass surfaces, providing a clear and unobstructed view of your outdoor space.Why Use the Wyze Window Mount for Your Yard Surveillance?
The Wyze Window Mount is an essential accessory for anyone looking to enhance their home security without drilling holes or complicated installations. It allows you to:- Attach your Wyze Cam securely to any glass window.
- Enjoy a clear view free from glare or reflections.
- Easily reposition the camera for optimal angles.
- Maintain a discreet and weather-protected setup inside your home.
Best Practices for Mounting on Glass to Maximize Yard Coverage
1. Choose a High, Central Window Location
Position your Wyze Cam near the top center of a large window facing your yard. This vantage point offers a wide field of view, capturing the majority of your outdoor space. The Wyze Cam v4, for example, features a 115.8° diagonal field of view, which combined with the window mount, can cover a broad area without blind spots.2. Avoid Direct Sunlight and Reflections
Mount the camera on the interior side of the glass where it won’t face direct sunlight during peak hours. This reduces glare and reflection, which can interfere with image clarity. The Wyze Window Mount’s design helps minimize these issues by holding the camera flush against the glass.3. Clean the Glass Thoroughly
Before installation, clean the window surface to remove dust, smudges, or moisture. A clean glass surface ensures the camera lens captures the clearest possible image.4. Use the Adjustable Mounting Style v2
The Wyze Window Mount comes in two styles, with Style v2 compatible with Wyze Cam v3, v3 Pro, v4, and OG series. This version offers enhanced stability and flexibility for positioning your camera at the ideal angle.Compatible Wyze Cameras for Window Mounting
Wyze Cam v4
- Field of View: 115.8° diagonal, 98.5° horizontal, 53.1° vertical
- Sensor: CMOS Starlight Sensor for superior low-light performance
- Body Material: Durable polycarbonate
- Colors: White, Grey
Wyze Cam v3 / v3 Pro and OG Series
- Compatible with both Style v1 and v2 Wyze Window Mounts
- Features include color night vision, motion detection, and weather resistance (for outdoor use)
- Ideal for users who want to repurpose existing cameras with the window mount accessory
Additional Tips for Enhanced Yard Security
- Combine your window-mounted Wyze Cam with other Wyze security products like the Wyze Cam Floodlight Plug-In Mount for added illumination and deterrence.
- Consider the Essential Security Bundle or Whole Home Security Starter Kit for comprehensive home protection that integrates multiple devices.
- For bird enthusiasts, the Bird Feeder Plug-in Cam v4 Bundle offers a unique way to monitor your yard while attracting wildlife.
Lifestyle Image: Wyze Cam Mounted on Window Overlooking Yard
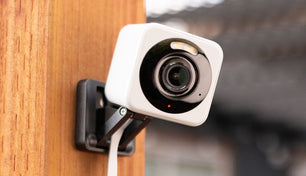 Capture your yard with clarity using the Wyze Window Mount and Wyze Cam.
Summary
The Wyze Window Mount is your go-to accessory for mounting Wyze cameras on glass surfaces, providing maximum yard coverage with minimal hassle. By selecting the right window location, avoiding glare, and using compatible cameras like the Wyze Cam v4, you can ensure your outdoor space is monitored effectively and securely.| Feature | Wyze Window Mount | Wyze Cam v4 | Wyze Cam Floodlight Plug-In Mount |
|---|---|---|---|
| Type | Accessory | Camera | Accessory |
| Compatible Devices | Wyze Cam v3, v3 Pro, v4, Wyze Cam OG series | N/A (Camera itself) | Wyze Cam Floodlight v1, v2, Floodlight Pro |
| Purpose | Mount camera on glass/window to reduce glare | Security camera with 2.5K QHD, color night vision | Plug-n-play mount for floodlight, no junction box |
| Price | $9.98 (Style v2) | $100.00 (regular), $35.98 (with 32GB MicroSD card) | $19.98 |
| Mounting Surface | Glass/window | Stand, wall, ceiling, magnetic wall mount | Floodlight mounting |
| Weather Resistance | Not specified | IP65 rated (weather resistant) | Outdoor safe |
| Key Features | Reduces glare, clear view on glass | 2.5K QHD, Enhanced Color Night Vision, Spotlight, Siren, Wi-Fi 6, 24/7 local recording, Alexa/Google Assistant compatible | 20 ft power cord, easy plug-in, outdoor safe |
| Included Items | Wyze Window Mount accessory | Camera only (varies by bundle) | Mount, mounting kit, foam tape, quick start guide |
| Power Source | N/A (Accessory only) | Wired (requires power adapter) | 110-120V AC input |
| Operating Temperature | Not specified | -4°F to 122°F (-20°C to 50°C) | -22°F to 122°F |
| Certifications | Not specified | N/A | UL153, RoHS, REACH SVHC 240, CP65, UL94, UL746A,B, ASTM D495, UL62, UL817, UL2556, UL1581 |
| Warranty | Not specified | 1 Year | Not specified |
What is the Wyze Window Mount and how does it improve yard surveillance?
The Wyze Window Mount is an accessory designed to securely attach Wyze Cam v3, v3 Pro, v4, or OG series cameras directly to glass surfaces. It provides a clear, unobstructed view of your yard, minimizes glare and reflections, and allows for easy repositioning to maximize coverage without drilling or complicated installation.Which Wyze cameras are compatible with the Wyze Window Mount?
The Wyze Window Mount is compatible with Wyze Cam v3, v3 Pro, v4, and OG series cameras. Style v2 of the mount is specifically designed for these models, offering enhanced stability and flexibility.How do I choose the best window location for my Wyze Cam to maximize yard coverage?
For maximum yard coverage, position your Wyze Cam near the top center of a large window facing your yard. This high, central location provides a wide field of view and reduces blind spots, especially when using cameras like the Wyze Cam v4 with a 115.8° diagonal field of view.How can I reduce glare and reflections when mounting my Wyze Cam on a window?
To minimize glare and reflections, mount your Wyze Cam on the interior side of the glass where it won’t face direct sunlight during peak hours. The Wyze Window Mount holds the camera flush against the glass, further reducing image interference.What steps should I take before installing my Wyze Cam with the Window Mount?
Before installation, thoroughly clean the window surface to remove dust, smudges, or moisture. A clean glass surface ensures the camera lens captures the clearest possible image.What are the benefits of using the Wyze Window Mount Style v2?
Wyze Window Mount Style v2 is compatible with Wyze Cam v3, v3 Pro, v4, and OG series. It offers enhanced stability and flexibility, allowing you to position your camera at the ideal angle for optimal yard surveillance.Why is the Wyze Cam v4 ideal for window mounting?
The Wyze Cam v4 is ideal for window mounting due to its wide-angle lens (115.8° diagonal field of view), superior low-light performance with a CMOS Starlight Sensor, and excellent night vision capabilities, ensuring clear monitoring of your yard day and night.Can I use my existing Wyze Cam v3 or OG series camera with the Window Mount?
Yes, you can use your existing Wyze Cam v3, v3 Pro, or OG series camera with the Wyze Window Mount. Both Style v1 and v2 mounts are compatible, making it easy to repurpose your current cameras for window surveillance.What additional Wyze products can enhance my yard security setup?
For enhanced yard security, consider combining your window-mounted Wyze Cam with products like the Wyze Cam Floodlight Plug-In Mount for added illumination, the Essential Security Bundle, or the Whole Home Security Starter Kit for comprehensive protection. Bird enthusiasts may also enjoy the Bird Feeder Plug-in Cam v4 Bundle.What are the best practices for cleaning the glass before mounting the Wyze Cam?How does the Wyze Window Mount help reduce glare and reflections?Can I use the Wyze Window Mount with my existing Wyze Cam v3 or v3 Pro?
You Might Also Like
- How to Set Up a Wyze Camera for Mailbox Surveillance Through a Window
- Achieve Wide-Angle Outdoor Views with Wyze Window Mount
- Best Wyze Indoor Camera Mounts for Glass & Exterior Monitoring
- Wyze Window Mount: Best Indoor Setup to Monitor Outdoors Through Glass
- Best Wyze Cam Window Mounts for Clear Outdoor Security
- Achieve Wide Front Yard Coverage with Wyze Indoor Camera Mounts
Shop smarter, powered by Big Sur AI